Hiking Guide: Beacon Heights Trail on the Blue Ridge Parkway
It’s no secret that there are tons of incredible hikes along the Blue Ridge Parkway. I’ve spent my fair share of time on the parkway, but I still have a lot of BRP hikes left on my to-do list. Some trails keep drawing me back over and over again – Beacon Heights Trail is one of those spots!
The Beacon Heights hike is conveniently located right outside of two of my favorite NC mountain towns: Boone and Blowing Rock. I think I find myself revisiting this spot anytime I visit the area because it’s such a short hike with an incredible payoff. I have this problem where I physically can’t drive past the trailhead without stopping. Not that I’m complaining… there are worse problems to have!
It’s hard to beat a Beacon Heights Trail sunrise (Rough Ridge Trail might win by a hair, but they’re both stunning). I’ll take you through what it’s like to hike the Beacon Heights Trail in this blog post, but I highly recommend that you go experience it firsthand!
Beacon Heights Overlook Trail Hike
Beacon Heights Trail isn’t a long hike (approximately 30-45 minutes roundtrip), but you’ll still want to bring some essentials along with you. Check out the end of this post for some of my suggestions! Click here to see my full list of hiking essentials.
Parking
Beacon Heights Trail address: Beacon Heights Parking Lot, Linville, NC 28646 (Get directions)
There are nine designated parking spots at the trailhead for Beacon Heights, which is located right off the Blue Ridge Parkway and just minutes away from Grandfather Mountain. The parking lot is very small, but there is room for spillover parking on the grass. You’ll likely see this area overflowing on a nice weekend.
I recommend arriving early since this is a heavily trafficked trail! If you can’t find a free spot right away, why not go for a 15-minute drive along the Linn Cove Viaduct and circle back? Since the Beacon Heights Trail only takes 30-45 minutes to hike, the turnover for available parking spots is pretty high.
[mailerlite_form form_id=2]Beacon Heights Trail Details
Quick Overview
- Difficulty: Easy
- Length: 0.6mi out & back
- Elevation gain: 147ft
- Time: 30-45 minutes roundtrip
To get to the trailhead from the parking lot, you’ll need to crossover Leason Carroll Gragg Road (the road in front of the parking lot shown below). There’s a paved path that leads you from the parking lot across this road and you’ll find the trailhead just slightly to your left.
The ascent at the beginning of the trail is the worst part because it’s steep and covered in rocks and roots. However, don’t let that deter you! The trail is only 0.6 miles roundtrip and 100% worth it. Once you get past the first section, the rest of the hike is at a gradual incline. There are a few concrete benches along the way in case you need a break.
There are a few forks along the Beacon Heights Trail because it intersects with several other trails. Go right at the first fork (shown below). This marks the beginning of the Tanawha Trail, which parallels the Blue Ridge Parkway and continues for 13.5 miles – past the Linn Cove Viaduct and Rough Ridge to Julian Price Park.
The Tanawha Trail is a great option for a winter hike on the parkway. Much of the parkway is gated off during wintertime but the parking lot to Beacon Heights stays open. If you want to hike the Tanawha Trail, start at the Beacon Heights trailhead and go as far as you wish before turning back!
After turning right at the first fork, the path widens and you’ll continue uphill for just a few minutes until you reach the second fork. This is where the Beacon Heights Trail intersects with the Mountains-To-Sea Trail. The “MST”, as it’s often called, is just that! It’s a 1,175 mile hike that spans across the state of North Carolina. Talk about a bucket list item!! I would love to thru-hike the the MST someday.
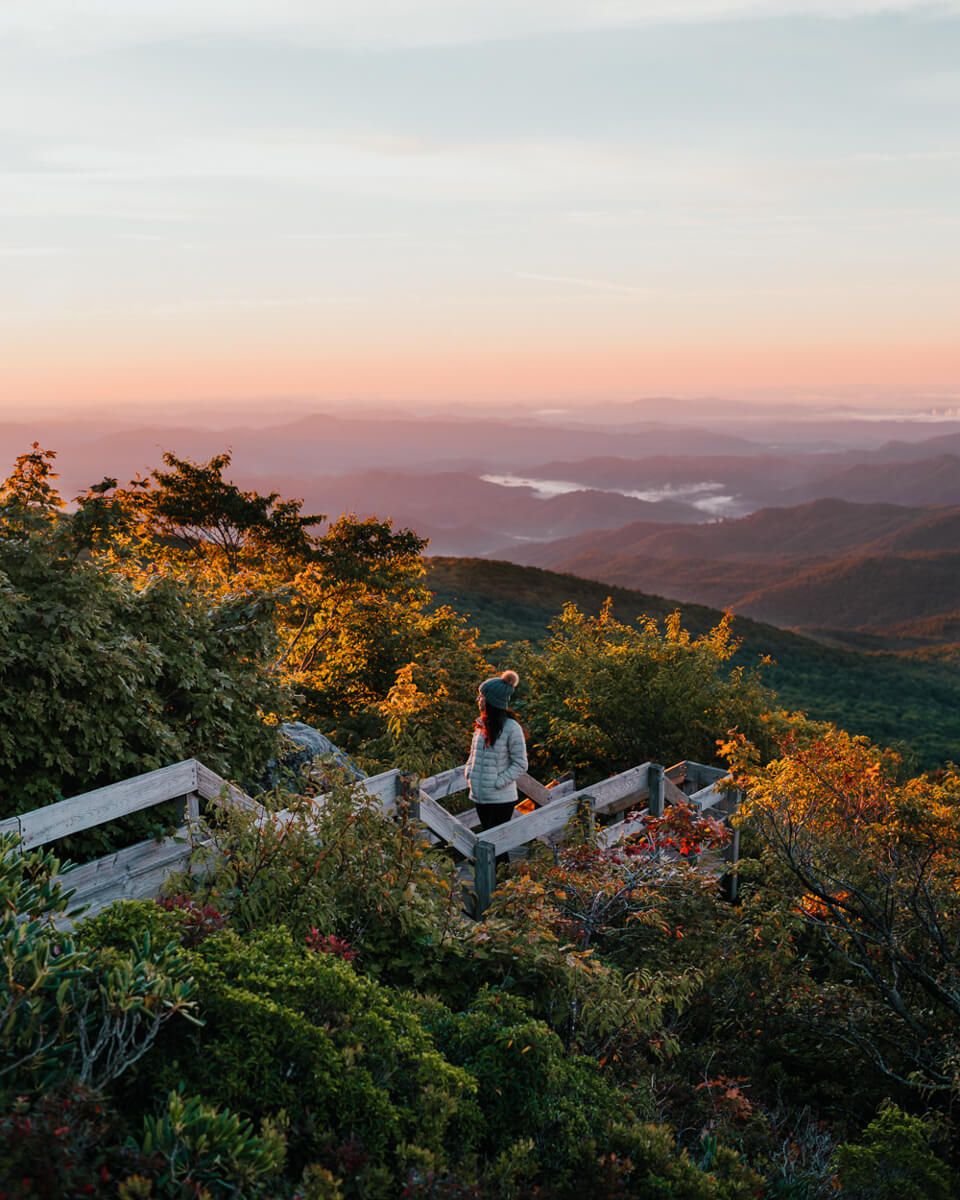
After taking a left at the second fork and walking through the forest for, yet again, a few more minutes, you’ll reach a third fork that’s separated by a bench. This fork leads to two different overlooks as is essentially the “end” of the Beacon Heights Trail.
There’s no right answer here as both paths take you to beautiful overlooks that face the same direction. Since both paths are extremely short, I recommend checking out both overlooks!
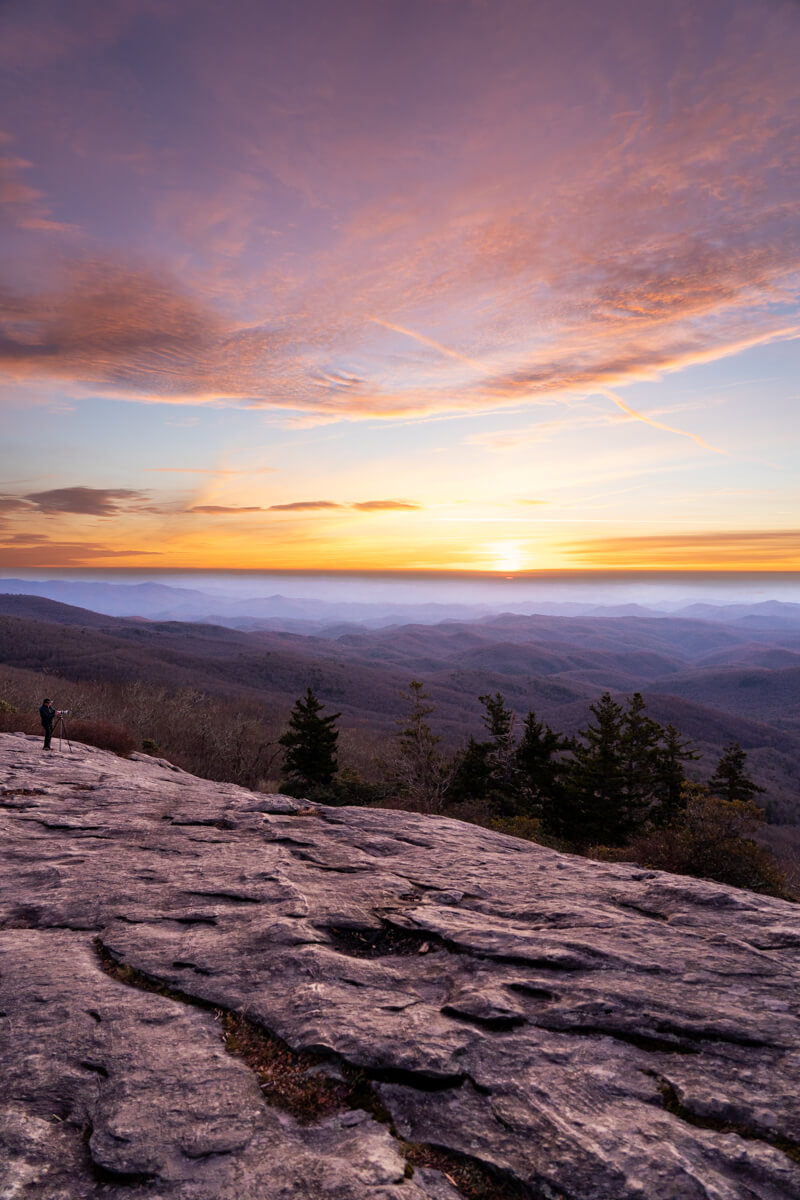
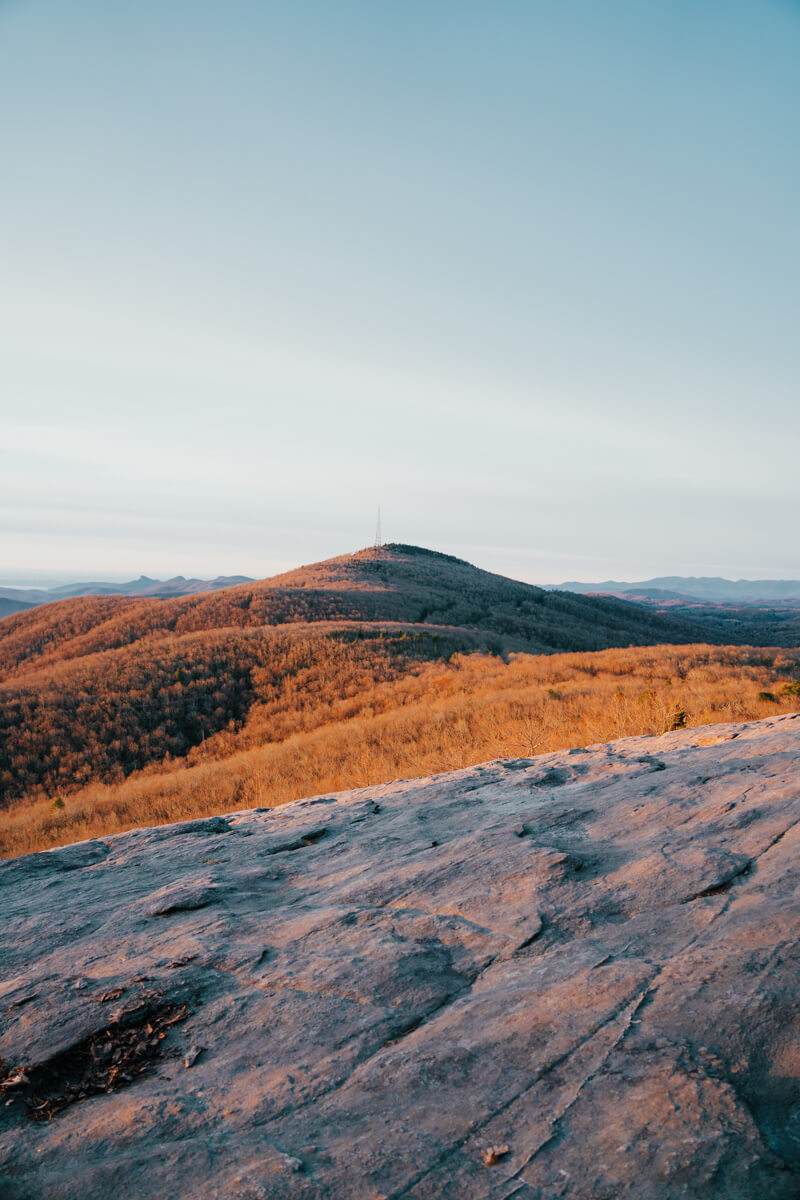
The Left Overlook path is slightly longer and will take you up some stairs to reach a large rock overlook that’s wide and gently sloped compared to the other overlook. There’s plenty of room to spread out.
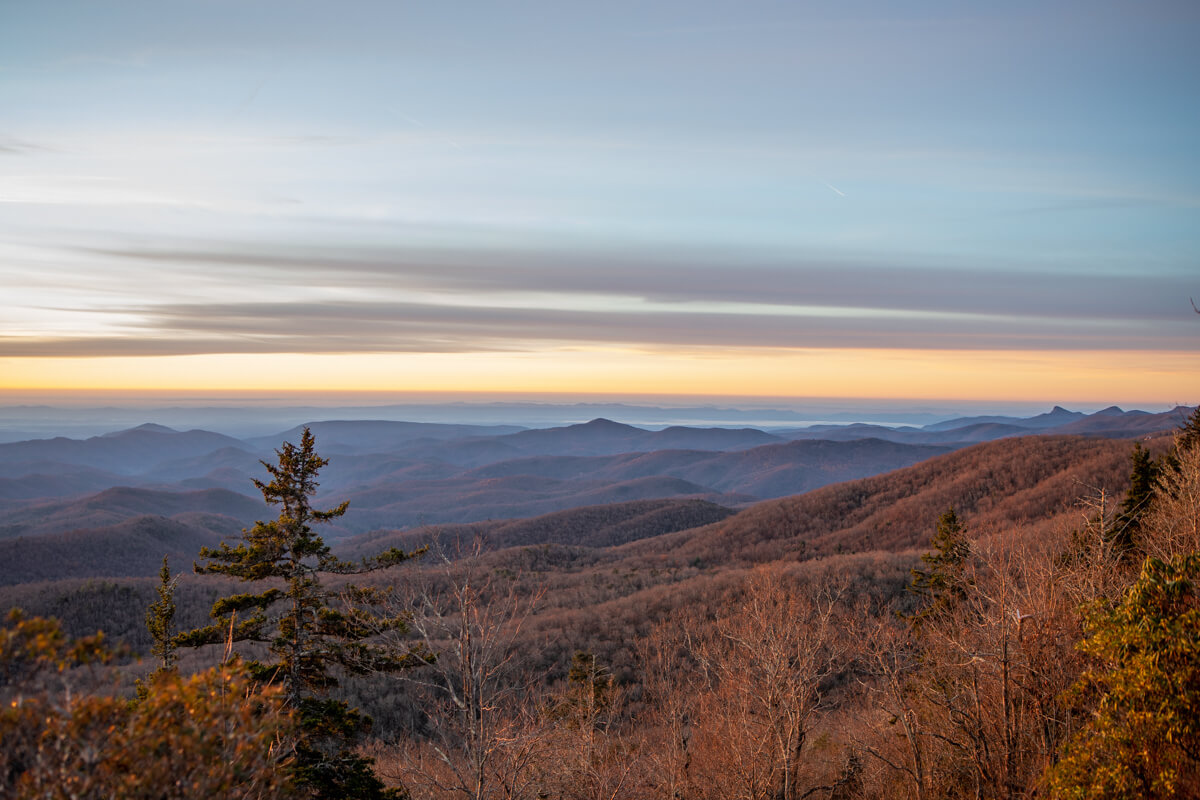
I love doing this hike for sunrise, but this spot would be perfect for an afternoon picnic too! I could sit here all day and admire the expansive views of the Blue Ridge Mountains. You can even see Linville Gorge, my favorite place to hike in NC, in the distance.
The Right Overlook path is very brief and flat, but the rock overlook on this side is much steeper. It’s not a cliff by any means, but you’ll want to be extra careful if you’re hiking with kids or pets.
I hope that I’ve convinced you to add Beacon Heights to your list! It’s a must-do hike along the Blue Ridge Parkway. Since it’s short and sweet, it’s perfect whether you’re looking to get out in nature for just a bit or tack an extra hike onto a adventure-filled day.
Also Read: How to Spend a Weekend in Asheville, NC
Nearby Hikes
There’s no shortage of incredible hikes on/around this stretch of the Blue Ridge Parkway! These are a few of my favorite hikes that I highly recommend checking out if you’re in the High Country.
Rough Ridge Trail
- Difficulty: Moderate
- Length: 2.5mi out & back
- Elevation gain: 757ft
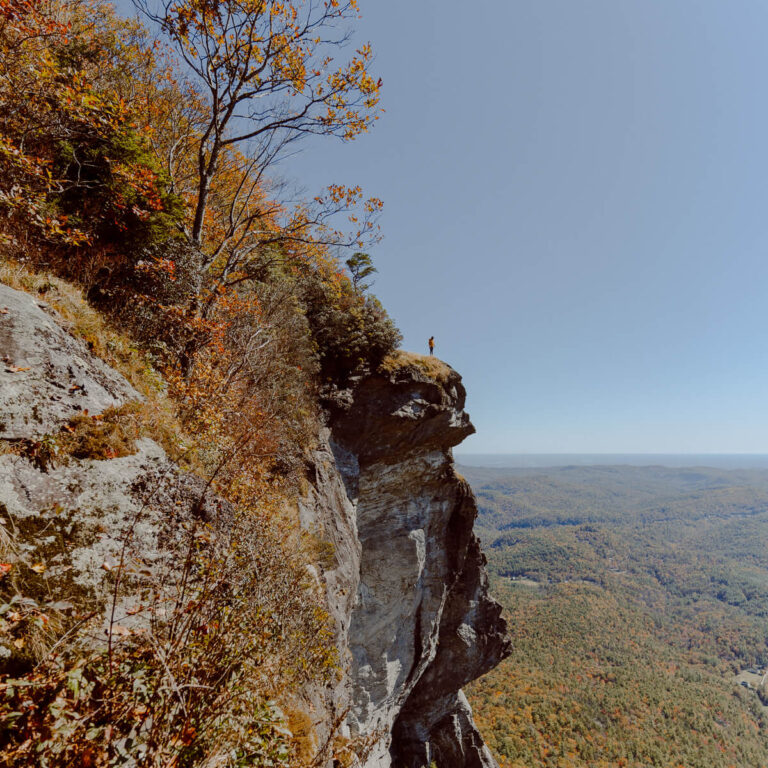
I’ve done this hike too many times to count. I’ve even woken up at 3AM to drive from the triad to make it for sunrise. I’ve met people from different states on this hike on numerous occasions. I would argue that this is North Carolina’s most iconic hike, and I HIGHLY recommend that you go see it with your own two eyeballs. My description can’t do it justice. The photo shown above is the closest I can get!
Boone Fork Trail
- Difficulty: Moderate
- Length: 5.2mi loop
- Elevation gain: 528ft
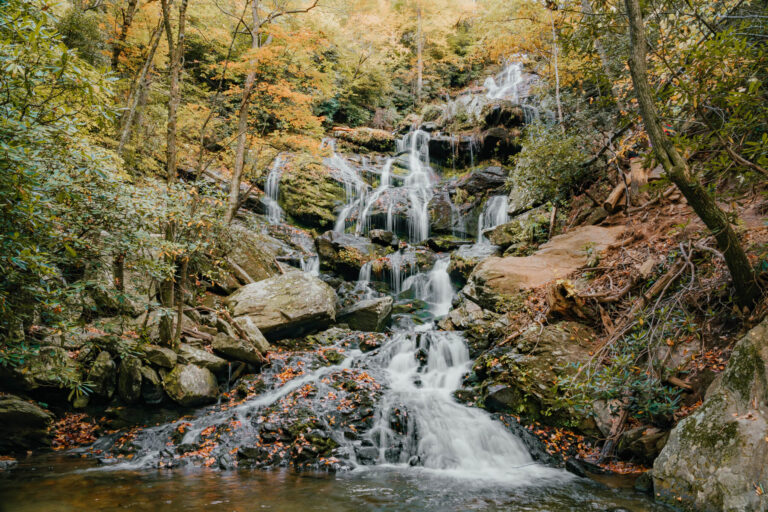
Boone Fork Trail is a great trail located within Julian Price Memorial Park. There’s tons of diversity along this trail, making it a fun hike. There are creek crossings, ladders, and even a waterfall! Julian Price Memorial Park is a great place to have a picnic or even camp. Make reservations at the Julian Price Campground here.
Mile High Swinging Bridge (Grandfather Mountain)

- Difficulty: Easy
- Length: 0.3mi out & back
- Elevation gain: 36ft
The Mile High Swinging Bridge at Grandfather Mountain is both handicap accessible and stroller friendly! Do note that you’ll need to pay an entry fee in order to access the park. You must purchase a ticket online in advance to guarantee your admission. Make your reservations online here.
Until recently, I hadn’t been to this spot in YEARS (like since a middle school field trip). I’m so glad I went back! It’s 100% worth the entry fee. You feel like you’re on top of the world from the bridge. The panoramic mountain views are incredible. Also, there are a variety of hikes up here if you want to do more than the bridge! Try the Grandfather Trail if you’re up for a challenge or the Grandfather Trail Loop (VERY different hike so make sure to confirm you’re on the right one) if you want something a bit more easygoing.
Also Read: 25 Stunning NC Waterfalls
Recommended Gear
- Day pack – This is the 24L Osprey bag you might’ve seen me carrying in many of my IG posts! It has so many pockets and compartments to hold everything and truly feels like a feather on my back. I always pack snacks, a small first aid kit, and my camera gear.
- Headlamp – If you’re going on a sunrise mission (my favorite time of day for this hike), make sure to pack a headlamp! You really don’t need anything fancy. I purchased this headlamp set off Amazon for right around $20. Just make sure you have batteries!
- Hiking boots – There are lots of rocks and roots along this trail, so you’ll want to have good ankle support. I recommend these Merrell boots. Out of all the hiking boots I own, I think these are perfect width-wise for the average foot! Sometimes hiking boots feel too clunky, and I don’t feel that way about these.
- Hiking socks – These Smartwool socks are my go-to. Brands like Darn Tough, Farm to Feet, and Smartwool all sell great wool socks. Farm to Feet socks are actually manufactured in Mount Airy, NC! Wool is the ideal material to wear on your feet when hiking since it regulates temperatures, which keeps your feet dry and warm.
Have you ever been to Beacon Heights Trail? It’s such a fun and easy hike on the parkway! If you haven’t done this hike, make sure to check it out next time you’re in the High Country.